Spring Flower Backdrop

Floral Backdrop for spring // Boots & Cats

This weekend I livened up the living room with a garden of  hanging tissue paper flowers and greenery. This project was amazingly fun to do and was pretty much essential to bring some spring colors into the apartment. This winter has been ruthless and I needed some flowers in here! Fingers crossed that there will be no more snow from here on out.

Floral Backdrop for spring // Boots & Cats

To make this bright springtime wall backdrop you’ll need:

  • Brightly colored tissue paper (I used a rainbow of colors, but any coordinating variety would work really well)
  • Matching washi tape
  • Scissors
  • Needle & thread

Blueprint for a Floral Backdrop // Boots & Cats

To begin, create a plan of how you want the florals to be arranged, so you know how many flowers you’ll need to cut from each color. I wanted to include all 7 colors I had on hand so a blueprint was a must. Measure the size of your wall-space and decide how many hanging strands you want, how many flowers you want to fit on each and if you want some greenery too.

I made sure to create a pattern that had a gradient like flow in the colors while having even amounts of each. This took a little bit of strategic planning at the beginning, but in the long run it really paid off to keep the arrangement balanced.

Once you know your plan, it’s time for tissue. The flowers needed a natural natural looking aesthetic that hung a little ‘floppier’, so I avoided the ‘pom-pom’ method that is quite popular on pinterest. After a few trials I came up with a method that worked quite well, even if it was tedious at times.

Floral backdrop for spring - Step 1 & 2  // Boots & Cats

1. Cut a strip of tissue at the width you’d like your flower to be.  For a fuller flower with more petals, fold the tissue to desired width first.

2. To add a ‘blend’ of colors, add a strip of another color and fold the whole thing over.

Floral backdrop for spring - Step 3 & 4  // Boots & Cats

3. Keep folding until your strip has become a square.

4. Fold one last time to make a triangle or rectangle depending on the type of petals desired.

Floral backdrop for spring - Step 5 & 6  // Boots & Cats

5. From here start cutting in your petals. Make sure to hold on to your layers and keep them together.

6. Open the flower. I reinforced the center on both sides with a matching washi tape dot to keep my flowers from ripping when hung.

Floral backdrop for spring - Step 7 & 8  // Boots & Cats

7. Pin with a sewing pin to keep the layers together.

8. Gently twist to spin the layers apart for your full bloom!

Watch out for pins! // Boots & Cats

I built all my flowers first before assembling the strands, but I could have strung them up as I made them. By leaving all the flowers with the sewing pins in them it became a bit of a hazard at times. Please use caution. Pins are stabby.

To create greenery, accordion fold a long strip of tissue and cut out a leaf shape. This time, let the layers be separated and reinforce each with washi tape at the stems.

Sewing in the details // Boots & Cats

With a green (or any color you’d like) sewing thread, measure out the total height of your backdrop. Double this length, thread your needle and fold the thread in two. Tie a knot at the end.

Floral backdrop for spring  // Boots & Cats

You will be sewing from the bottom of the garland to the top. Keep this in mind when following your blueprint. Tie a knot in the thread where you want your floral or leaves to stop, then use the needle to thread it onto the line. Be sure to use a small hand-sewing needle or it will create a hole larger than the knots you tie and your flowers will slide all the way through. Repeat this process as you move up the garland. I found it easiest to tape the end of the string down and work outwards.

Floral backdrop for spring   // Boots & Cats

Using washi tape, fasten your strands to the wall! I taped them at the top and bottom to avoid tangles when the window is opened.

Floral backdrop for spring // Boots & Cats

Once up, you may want to twist, open and fluff your flowers up a bit.

This project took around 6 hours total to complete. It also had a lot of off-cut tissue paper. I shredded the leftover into rainbow mix of confetti for a future occasion.

projects

I am in love with the results of this project. It suddenly feels like a full change of season in here. (Now just for it to happen outside as well!) I’m sure you’ll see it popping up in the background of all sorts of things this spring.

Happy Monday!

Adventures in Stamps

adventures-in-stampsOkay okay…week one and I already didn’t meet my goal of posting between Monday and Wednesday. I am consoling in the fact that I finally finished organizing the last moving boxes in the back of the closet abyss this week so in the grand scale of things, it all evens out somehow.

Anyways…it’s time to talk about stamps.

At my winter craft party, Rory spent his time carving out a footbag stamp, and then for Christmas I received a plethora of stamp pads in various colors, so I guess it was time to try making stamps. The concept seemed easy enough but it was my first try at it. Luckily I had seen Rory’s method and he had all the primo materials already at hand.

Materials you need:

  • Rubber eraser (to be the stamp)
  • Fine point Sharpie (for markings)
  • Small Xacto knife (to carve your design)
  • Stamp Pads
  • Paper

sketches

I started with sketching out some ideas. I knew I was going to use them for note cards and memos, so I sketched out things that would make nice patterns and would fit on the cards well.

Trace

Once I had chosen my first design, I traced it with sharpie fine point onto my eraser. I found this collection of erasers at the dollar store. They had a good width for these stamps. For larger designs you might have to invest in more proper materials.

xacto

Using the Xacto knife, follow your design and remove the negative space (since you want your design to be raised above the rest). It can be somewhat tedious especially if your design is complex, but it really helps to use a sharp knife. The easier to slice the rubber, the more precise your design can be.

hilarious

Sometimes your designs and materials create hilarious coincidences.

experiment

Carving designs isn’t the only way to make stamps. Pinterest is full of ideas of how to use other materials to create unique designs. I quite liked the look of using string to create a cross-hatching design.

Practice

Once you have created your design and accompanying pieces, test it out! Try different combinations of colors, or over-lapping stamps. See the difference in using full on ink, or dabbing it after is has faded. The combinations are endless.

Play

The play around with it some more. Trust me, stamping is addicting!

Notes

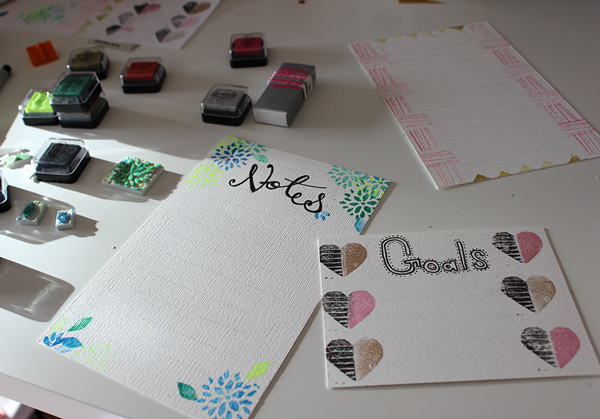
Once I was happy with colors and textures, I traced out the note cards in which I would be decorating

stamped-cards

I made one for general notes I need to remember (so much better than post-its), one for my big goals this year and one extra for who knows what!

(To get the two-toned effect on the hearts, I just dipped half the stamp on one ink pad, and the other half on the other!)

note-card

I now have beautiful hanging cards on my cat note holder. Such a lovely, bright addition to my work space.

Have you ever attempted to make stamps? I’d love to see your projects!

DIY Summer Shorts // Part 2

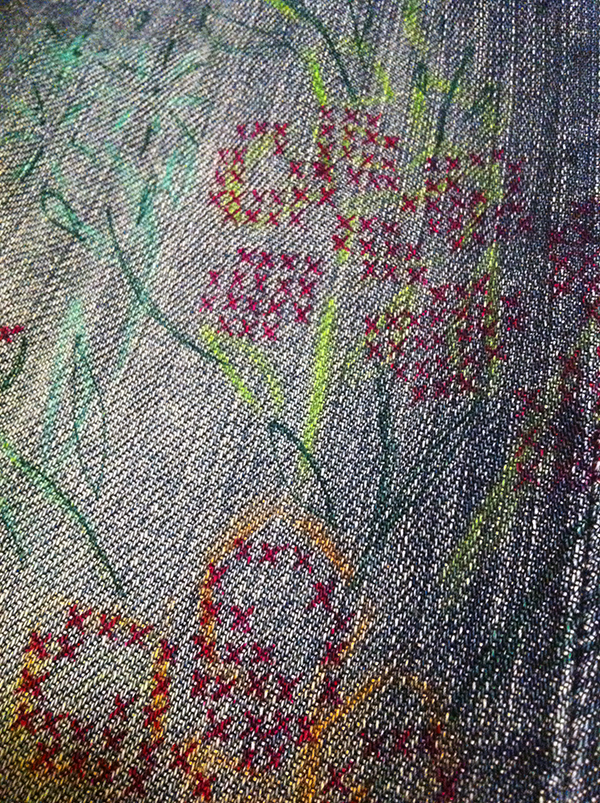
part2banner So as you probably have guessed, I decided to jazz up my new summer shorts with some unique floral detail. I wanted to create a soft bohemian feel, so I found an embroidery pattern on flickr, provided by doe-c-doe.  I wanted the shorts to have a fun, enlarged cross-stitch effect, so I went with large florals with some variety and I wanted the pattern to take over the shorts a bit.  I made sure elements wrapped around front to back, as well as adding parts of the pattern to other places, like the pockets and the other leg. stitching I began by drawing the shape loosely with pencil crayon, I didn’t want to stain the denim permanently, but once I needed to start stitching in the finer details (the x-es) It wasn’t going to cut it. After a brief search for a washable fine point pen, I settled for Sharpie. Once the stitching is on top, it won’t show through much, and if it does, I’d like to think it will be a little like a drop shadow. marking It was actually pretty time consuming to make sure my marks were consistent to the pattern and to each other, especially since denim twill doesn’t have a nice grid like weave. A friend suggested that I could take cross-stitching fabric (or embroidery grid) and lay it on top of the denim and use the sharpie to mark the “holes” in the weave, so I would have a nice little grid dot layout. If I had some on hand, that would probably have been helpful. marks Even more time consuming is the stitching! I have to be very careful to keep consistency between my x-es, so they look neat and refined. choices But now I need your help and opinions! Apparently I am really bad at making up my mind, so I am asking the internet for help. Do you like the thicker stitches on the left, or the narrower ones on the right? And colors? I originally wanted a de-saturated soft boho feel to my shorts, but now that I have drawn on with the sharpie, I am kind of digging the more saturated palette. Thoughts?

Also, this week I am off once again to the beautiful Montreal! I wish I could get some stitching done on the plane. But you know, no pointy things allowed. Hopefully I can find time to get this project finished. These would be perfect to wear to Osheaga!

BlogShop Vancouver

header

From the very moment I saw the post on DesignLoveFest announcing the dates for BlogShop in Vancouver, I knew I needed to be a part of it and started arranging plans to get myself there! No mountain high or valley low, baby, I was going to get me some Photoshop learning! Little did I know of what exactly was in store for me.

For those of you who might not know, BlogShop is a two day super-jam-packed workshop focused on teaching the ins and outs of Photoshop in the context of blogging. From the basics of what tools are which, all the way to fancy (yet still do-able in 5 minutes!) applications that can make all your photos POP! All taught by the amazing, funny and talented Bri Emery (DesignLoveFest) and Angela Kohler (Angela +Ithyle).

I had liked to think I was fairly knowledgeable in the realm of Photoshop, that I knew my way around, but looking back now, I think I was more like a caveman mindlessly bashing his hands into the keyboard.

colors

The very first thing we covered was the basic functions of the program, and I have to admit, I mentally prepared to just fly through this part, thinking I knew it all. Was I ever wrong. I think that first half an hour had the most “OHMIGOODNESS ARE YOU SERIOUS?” moments. From then on I was ready to soak up every little bit of knowledge they had to offer.

The biggest asset taken away from this class was the ability to save time, with shortcuts and methods that are far simpler than I  had previously been doing them. No longer am I afraid that prepping a blog post would need hours of time set aside.  A huge +1 for efficiency!
Ohmigosh the FLOWERS. Talk about amazing.

Ohmigosh the FLOWERS. Talk about amazing.

Beyond the incredible lesson plan and activities to practice these skills, BlogShop was a haven for inspiration. Beautiful decor, delicious food and snacks, a unique venue, it was like living in a dream. Not to mention all the current and future bloggers in attendance. These ladies were such an amazing bunch, all full of their own ideas and sharing a passion for a beautiful life.

Being a usually shy person, I was worried I wouldn’t have the chance to be very social, but everyone was so open, welcoming and enthusiastic, I felt right at home. I even got the opportunity to do a mini photo shoot with Destani of Peaches and Mischief in the courtyard. Talk about awesome.

Yes. Yes we do. nom.

Yes. Yes we do. nom.

We were also treated to a little goodie bag of inspirational items to keep filling us with joy. I am especially excited to play around with that mini calligraphy kit from Blue Eye Brown Eye. It’s something I have always wanted to try. Although I can imagine I will probably end up with a lap full of ink.

Goodies

I left the weekend feeling enriched, enlightened and inspired. I just want to start pumping out a million posts, redesign my site and start creating content everyday. However I know that it wouldn’t be sustainable to do so, so these things will come one step at a time, but I am full of excitement and joy to do so, and I hope you can feel it too.

Bri and Angela are seriously kick-ass!

Bri and Angela are seriously kick-ass!

For anyone who has a blog, who didn’t go to graphic design school, I highly recommend this class! And even if you don’t have one yet, this is a great place to remove your doubts about your presentation skills, and will surely give you the confidence to get started! The knowledge gained can apply to more than just blogging too! I know my friends and family are going to get much prettier birthday cards this year and my to do list taped to my wall will be getting a pretty facelift.

Thanks so much to Angela and Bri for coming up to Canada and sharing their skills and wisdom with all of us. I am sure our blogs will never be the same!

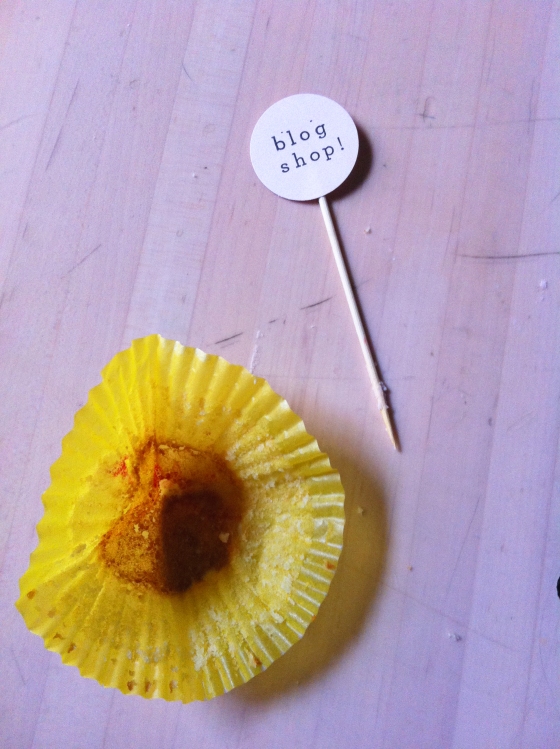
cupcake2

nom.

Inspiration // Prints!

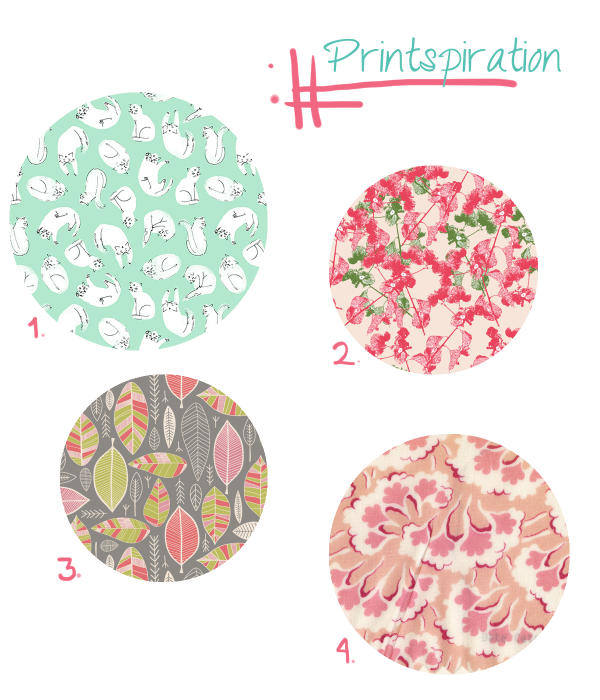
Now that spring is (slowly) coming upon us, it is hard not to feel excited for bright colors, pretty florals and fresh motifs. I have collected a few of my favorite prints from the internet at the moment that captures how I am feeling this season! From illustrators to textile designers to fabric from the 19th century, it’s easy to find inspirational beauty everywhere you look!

printspiration

1. Esther Lara / 2. Bethania Lima / 3. Alison Tauber / 4. The Design Center