For the longest time I was a one-and-done seamstress. It was rare for me to make the same pattern twice, and if I did, it was in a wildly different fabric or for a specific situation. I sought out novelty and let the TNT (tried ‘n’ true) train chug right on by. It felt wasteful to have multiples of the same thing in my closet when variety was the spice of life. Why wear one thing, when you could wear ALL THE THINGS?
As time wore on, my skills improved and I settled into my style persona. I started making patterns that were quick and satisfying, but elevated my wardrobe in a major way. And repeating them. Thoughts would drift to new fabrics and colours of these basic patterns that could fill multiple spots in my wardrobe. It became apparent that if I made variations of similar building blocks, I could make outfits I knew would look good without much thought. They could be mixed and matched in endless ways, which turns out to be much less wasteful than lots of single pieces that would only work in one specific outfit. Maybe there was something to this TNT thing after all.
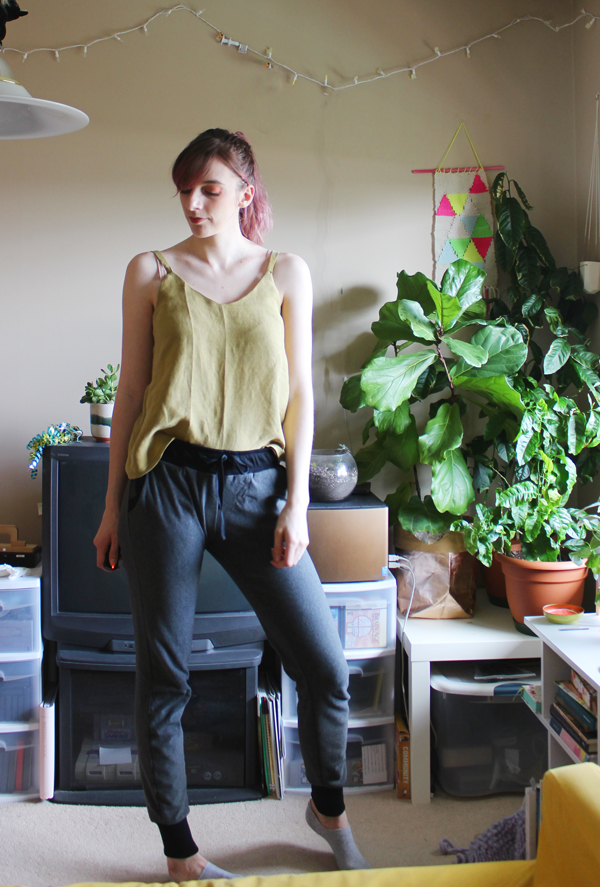
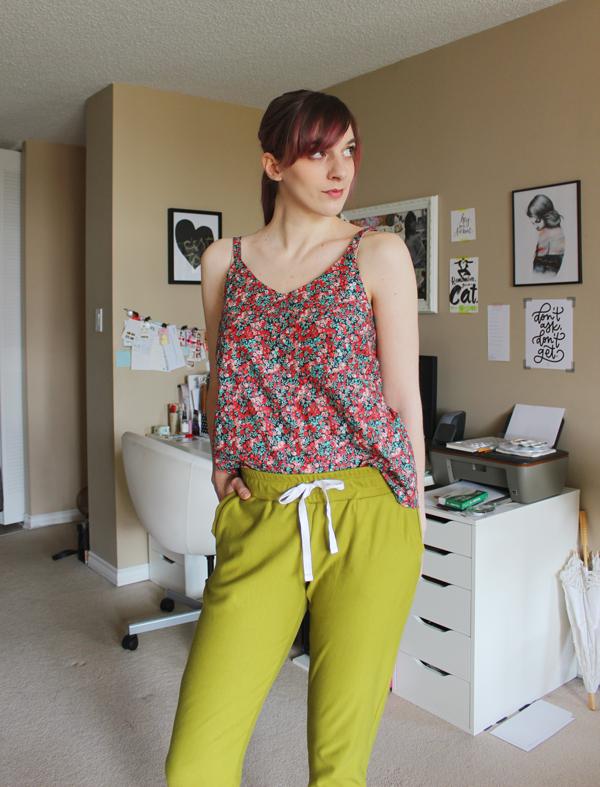
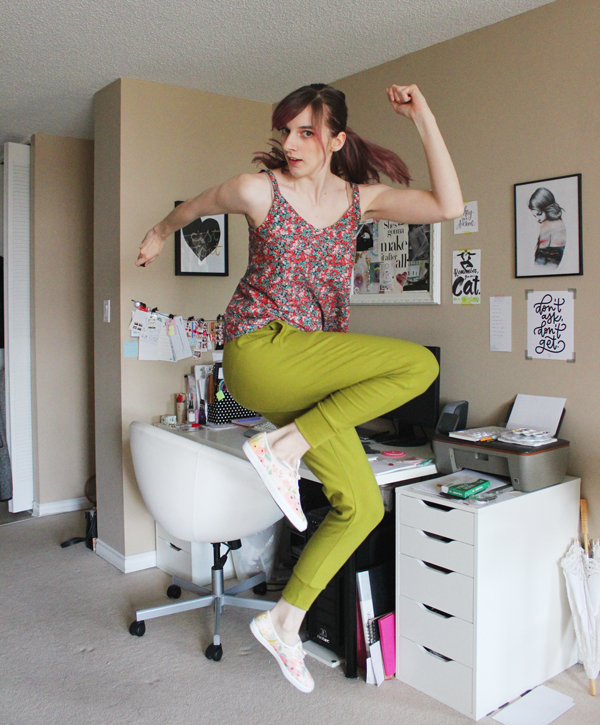
The first of this new wave of TNT’s was the True Bias Ogden Cami. I was wary when it first hit the scene, as I traditionally avoid v-necklines at all costs. But one New Year’s Eve I needed a quick pattern for a sequin top and the simple lines and easy PDF print made me take the plunge. And whaddya know, I found the neckline to be flattering in a way that v-necks typically aren’t on me. I really loved that sequin one, and then a few months later I needed a project to bring along to a sewing afternoon with a friend. Few pattern pieces, no fiddly notions, and could be completed in a few hours? Check, check and check. The rest, as they say, is history.
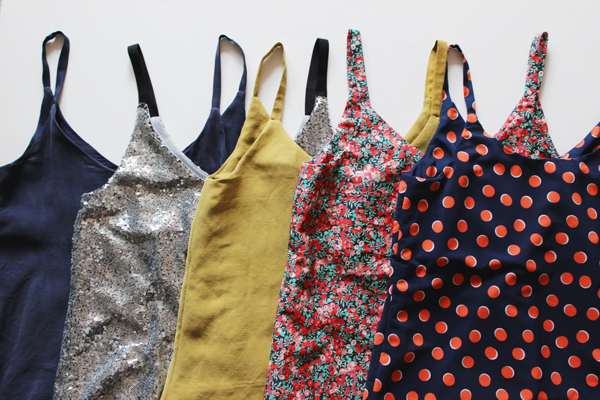
As this spring approached, I cut out three more in a variety of fabrics to suit different moods and outfits. One sophisticated solid linen, one punchy Liberty lawn and one breezy polyester polka dot print. I decided to knock them all out in tandem. Can I just ask, how come no one told me how awesome batch-sewing is? It was so satisfying to watch them all come together as a group and having 3 full new garments at the end of what felt like one project.
In order to streamline my progress, I determined that a navy thread was a common enough colour denominator between the three fabrics. I used that for the entire construction, only changing to matching threads for top-stitching and under-stitching at the end.
The only pattern changes I made were extending the length about 4 cm (which I slashed and spread right into my pattern pieces so all future ones will be this length), and I got slightly adventurous and rounded the neckline on the polka-dot one, to see if I’d like it. It works, but it takes away a bit of the “style” of the pattern I think, and makes it more basic. I’ll only do this again if I am making ones specific for layering with other things.
Now, normally I’d be pairing these new tops with jeans and a cardigan and be on my way, but as we all very well know, ain’t no one wearing jeans right now. I needed comfy pants (that aren’t literal pajamas) and stat.
I knew the ticket would be the True Bias Hudson Pants (I just realized this is a full True Bias look!). I’ve had this pattern for years in PDF form after it came bundled in the Perfect Pattern Parcel (RIP). I bought the bundle for the Julia Cardigan, but was interested in the Hudson; I just never really had the need for them until now.
I searched my stash high and low for the right fabrics, trying to not break my recent “no shopping until you complete the other things you started” rule, but right now, most of what I have on hand are woven fabrics and novelty prints (or not enough of something for pants). Blackbird Fabrics just *happened* to release a collection of bamboo and cotton stretch fleece fabric a few weeks ago and it just called to me as the comfort I’d want in a house pant.
And yes, these are going to be house pants. I could wear them out in the world (once it’s safe to do so, obvs), but if you’ll allow me a small side story…
A few years back, a few sewing bloggers talked about the Kibbe style identities. I went down the rabbit hole, and while there are some issues with the system (and fashion has no real “rules”), one part of the system really struck a chord with me and helped define something I had trouble articulating in my closet. The system recognizes 3 different ‘levels’ of dress, 1 being most casual, and 3 is most formal or “dressed up”. Different style personalities can play with the bounds of these levels more than others. For example; on some people, joggers and a tee looks stylishly casual as level 1, while myself in the same outfit feels like I look like I’m heading off to help paint the fence (level 0? Ha). I fall under soft dramatic, which tends to work better in things that are a little more streamlined and crisp, leaning a level higher than other types. I’ve always felt sloppy in very casual clothes, like cute hoodies or graphic tees, even when those items look SO GOOD on others. On the flip side, I feel like I might wear my Keilo Wrap Dress in more casual settings than the style typically suggests. This is just what resonated with me though; you sew you.
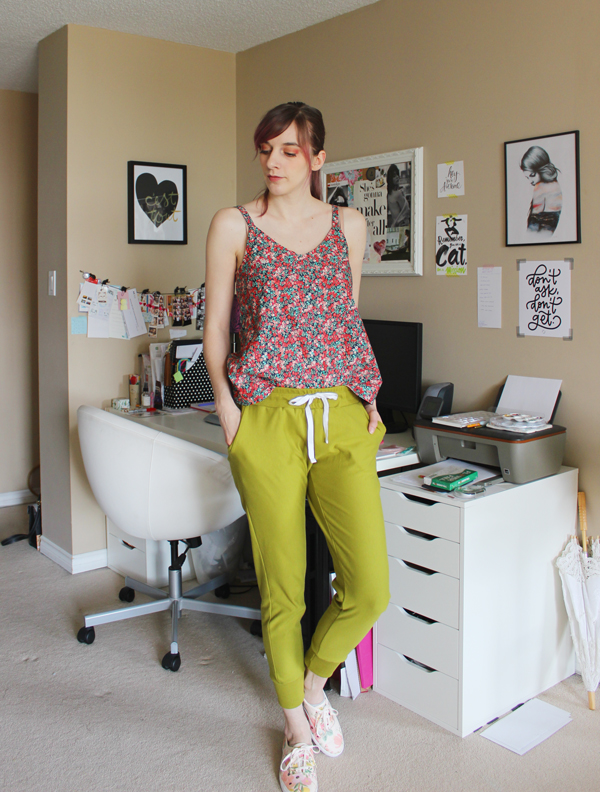
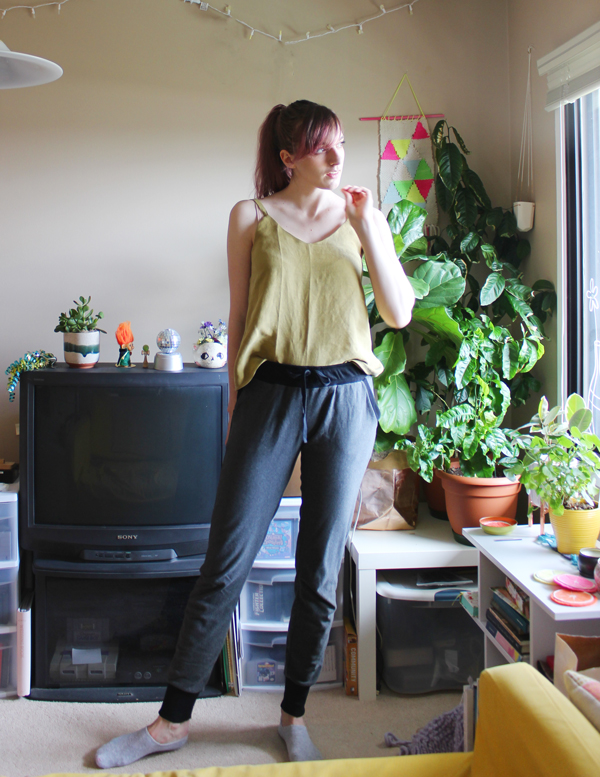
Anyways, for comforts of home, these joggers were a super fun and fast make, and especially since I also batch-sewed these. I did them up mostly on my serger and they came together in just a few sessions with very few changes. I wanted the lime green pair to be cropped at the ankle but not as short as mid-calf pattern option, and the grey pair to be full length. The pattern is drafted for a 28″ inseam, and since I have a 30″ inseam, I left the pattern as-is for the green, and added the 2″ extra to the grey. My only complaint is that I wish I took in the waistband juuust a smidge. It’s slightly too large and I have to rely on my drawstring more than I intended. I could take the elastic in, but the amount of unpicking required isn’t worth the amount it actually bothers me. It’s more a note for future versions I may embark upon.
I am super happy with these pants, as they are as comfortable as pajamas, but I feel a little more like myself putting them on in the morning. I love the contrast details with the black and grey and the bright punch of color with the green that make them extra special. I’m not embarrassed to go check the mail in these, and the soft fleece is so heckin’ cozy.
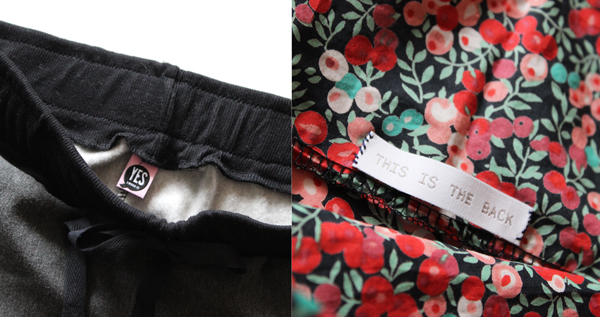
Once I finished both the pants and the camis, I wanted to finish them up extra special. Enter: some fun labels! These are from Kylie and the Machine and I got them from Blackbird Fabrics. The “this is the back” tag I find especially useful on the Odgens, since the back and front are very similar and I have gotten mixed up on more than one occasion. It’s an extra special touch that I want to put into more of my garments, especially the ones that I know I will wear a ton. It just feels a little more legit, y’know?
Now if you’ll excuse me I have to live out the rest of my Me Made May days in these comfy clothes and make more progress on my UFO (Unfinished objects) list. Happy weekend!