Flower Power Pt. 2 // True Bias Marlo Sweater

IMG_8489

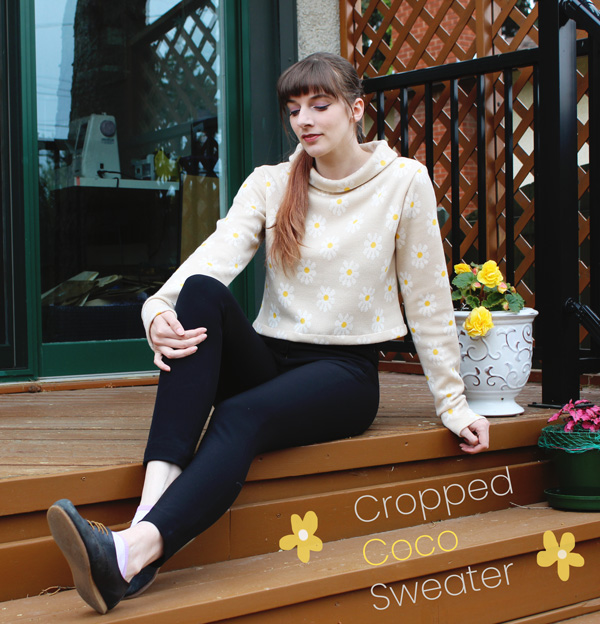
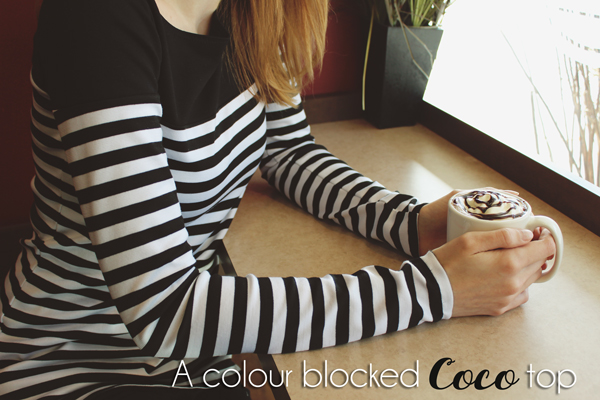
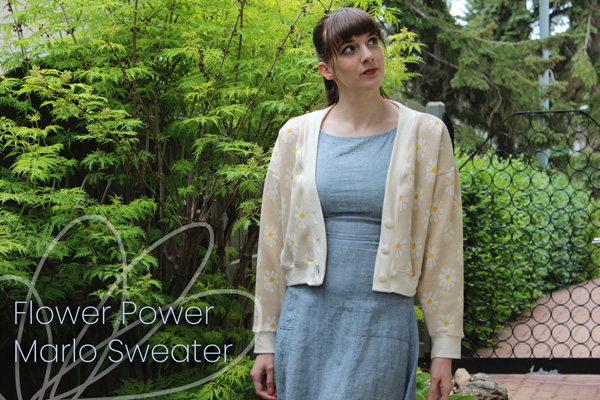
Hello and welcome back! This is the second of our adventures with this daisy jacquard knit fabric. In case you missed it, I bought 1.5 meters of this fabric and couldn’t decide between two patterns to make from it, so I got creative and managed to squeeze two cropped sweaters out of it. The first was a retro Coco Sweater and the second is this relaxed True Bias Marlo cardigan.

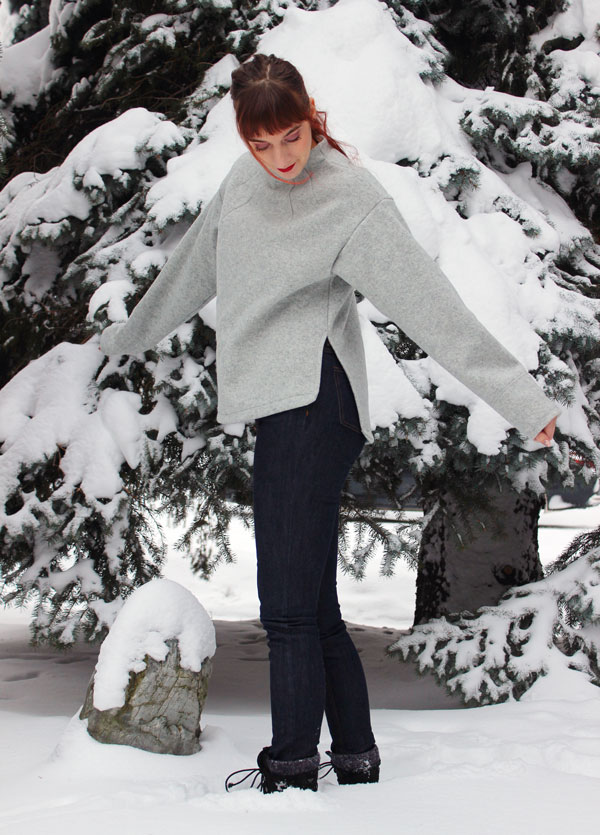
I knew this pattern would be a great fit for this whimsical print. I loved the look of  the relaxed, slouchy fit, and together feels like a cool grandma’s sweater.

IMG_8546

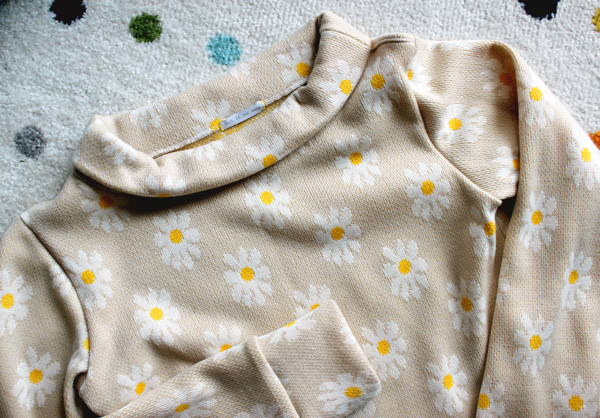
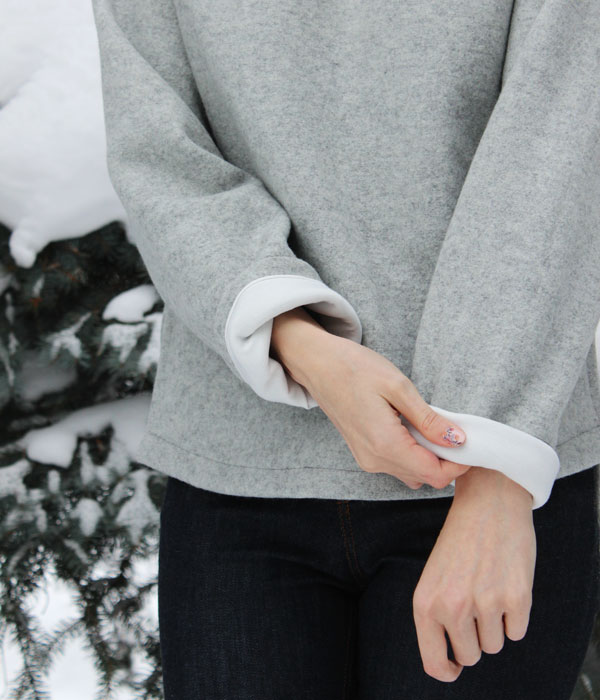
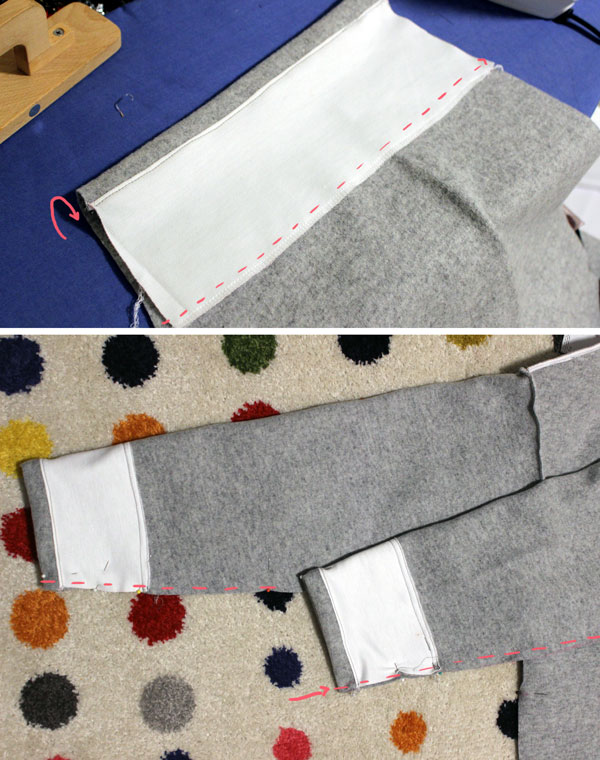
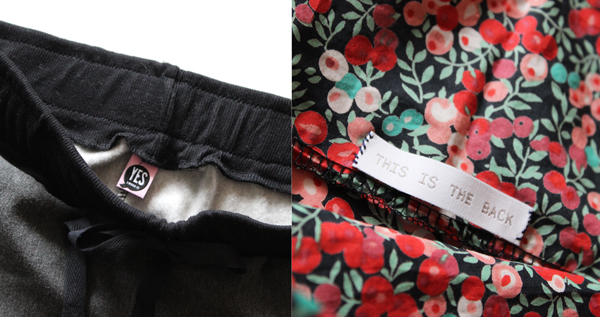
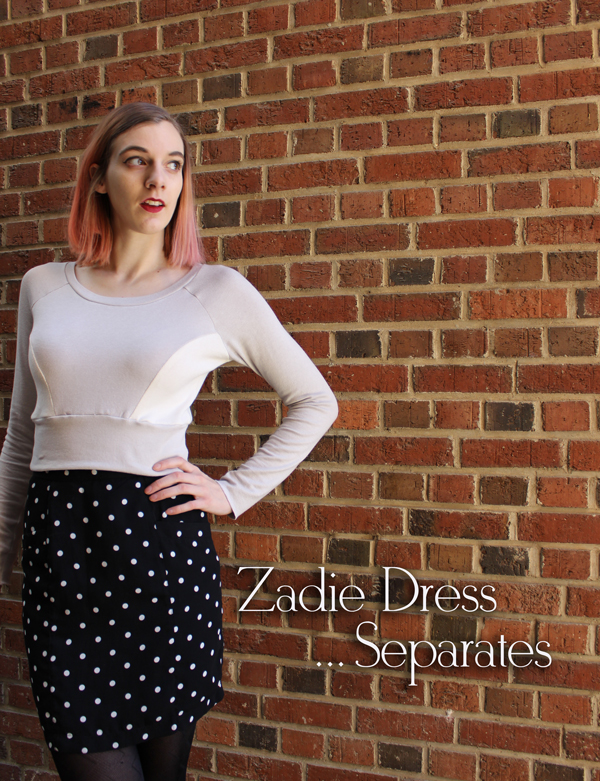
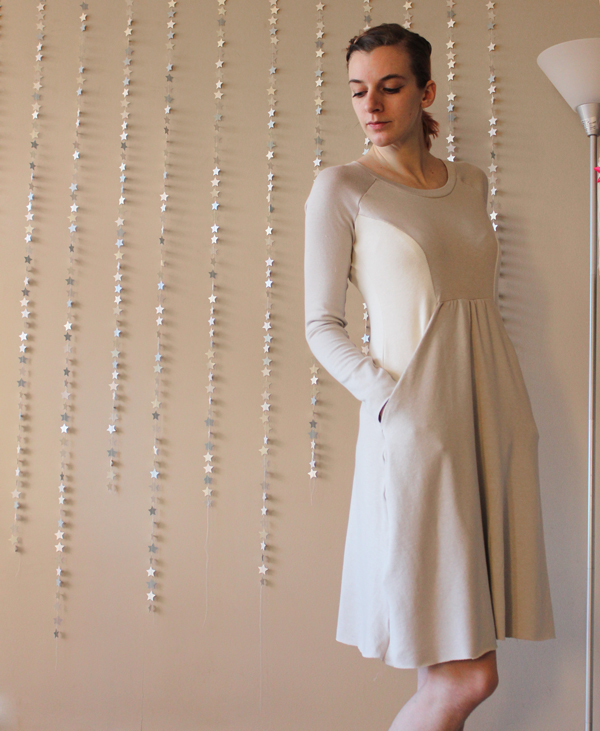
In my deliberations, I really considered making the full sized version for the ultimate laid back comfort, but I to get the most of my fabric it would have to be the cropped version. Thankfully I found the perfect coordinating solid knit fabric for the cuffs and neckband in the back of my stash (leftovers from my Zadie Dress) . This ended up being the perfect find, as it is slightly thinner and folded over nicely. I think if I used the self fabric it would have felt too bulky.

IMG_8587

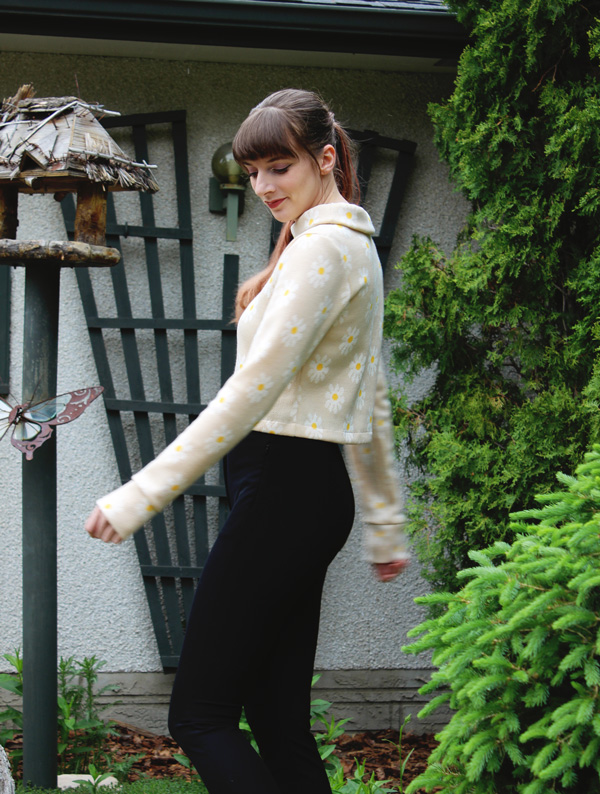
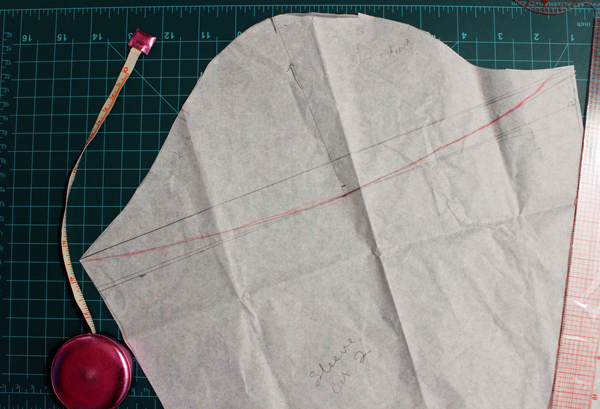
I cut a size 4 and made only a few adjustments. Normally, even with a cropped sweater, I would add a little bit of length to the torso but because I was playing fabric chicken, I didn’t have the real estate to do so, but I did have enough room to add an extra 2cm to the sleeve length (#longsleeves4eva).

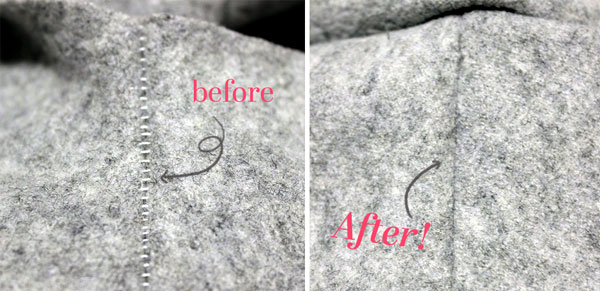
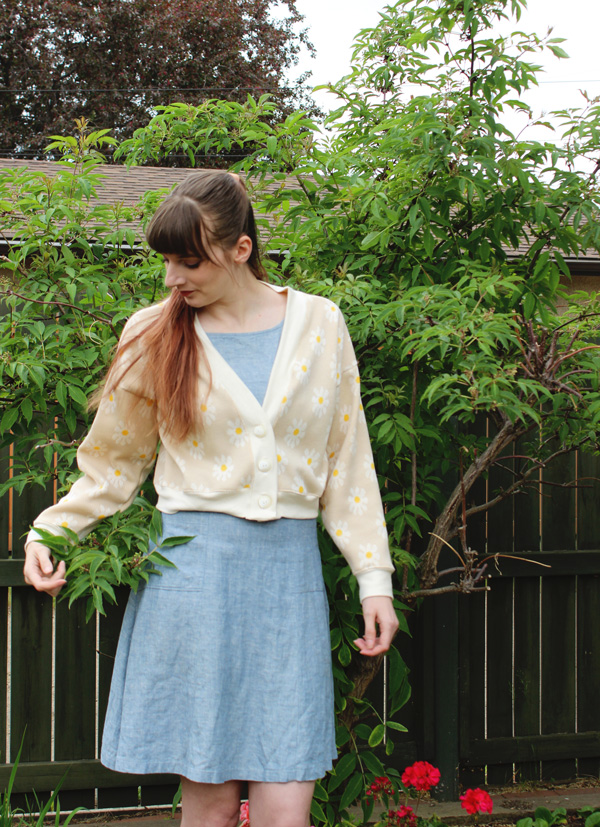
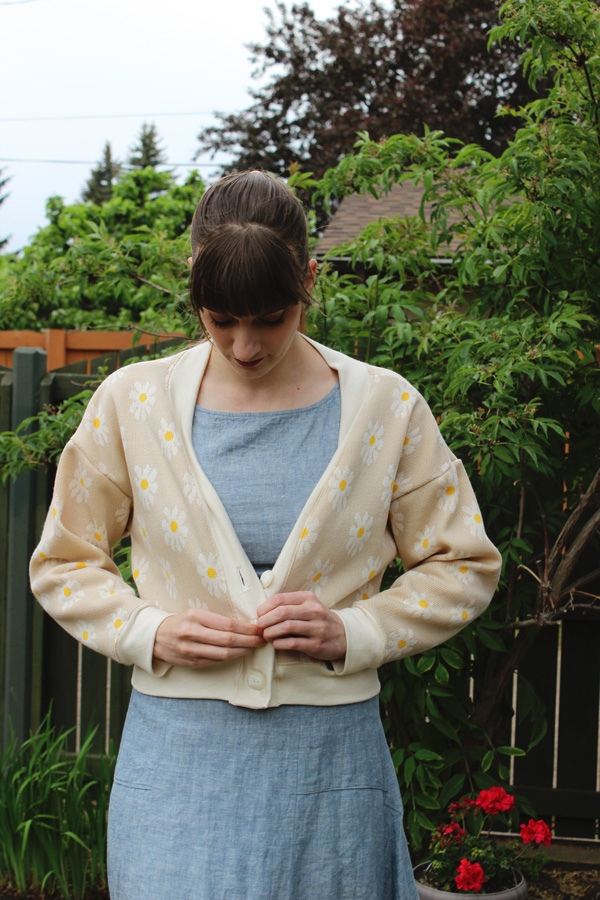
I also adjusted the placement of the button closures. I felt that the original placement made the neckline closing too high, and I liked the idea of having it feel a little more open even when buttoned up. I played around with the placement by just pinning it as I wore it. The softness of the binding allowed me to be more flexible here as the neckline curved however I needed it to.

IMG_9021

Speaking of buttons, I found three perfect buttons from my collection that complimented things well. I am always wary of buttonholes, since it feels like everything can go wrong here. So I diligently practiced on some scrap fabric. No issues. And then it was time for the real thing aaannd my bobbin got tangled. Luckily that was the only snafu and it didn’t damage my fabric too badly when unpicking it. No matter how many times you practice those buttonholes are always out to get you…

IMG_8651

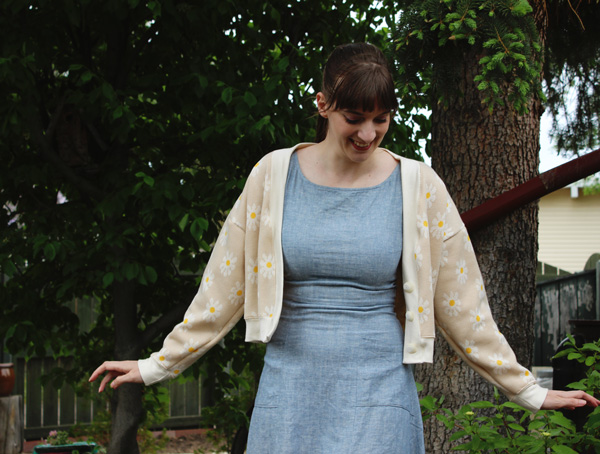
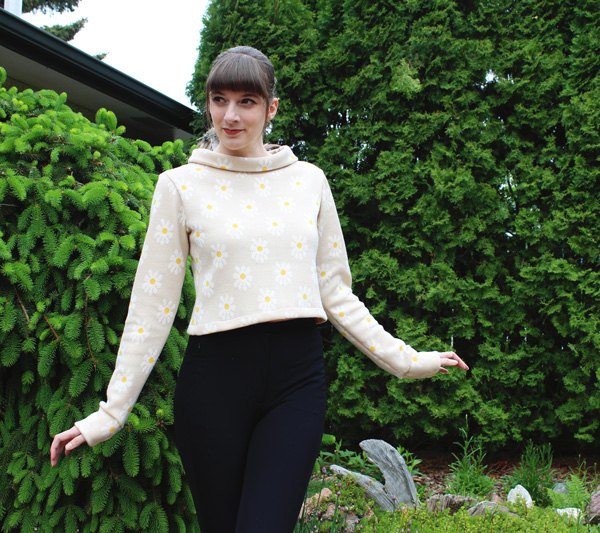
The final garment is adorable, on trend and so cozy. I do find this a bit challenging to style as I don’t have anything else quite like it in my wardrobe, but it’s been a fun challenge to experiment mixing it in. Especially since it’s just so darn comfortable. I think adding that extra length would have helped if possible. While I truly believe that you should wear whatever you want at whatever age you are, I personally don’t like showing off midriff so there are some limits to what I can pair this with at this length.

I hope your spring has been sunny and I will be back soon with an in-depth post about how I managed to squeeze both patterns from my limited fabric yardage. 

Flower Power Pt. 1 // Tilly and the Buttons Coco Top

IMG_8411

Well hello there friends! It’s been a while. Spring has come in roaring and ready this year, basically kicking off with a few weeks of summer-like weather before settling back into its normal routine. Flowers are steadily popping up from the ground and I am finally getting around to sharing some cute floral numbers I sewed up literally about a year ago. (Better late than never!).

The story begins with this irresistible daisy jacquard knit from Blackbird Fabrics. It was selling like hot-cakes and I snuck in my order with the last 1m they had left. I sent an email to see if there was a little bit extra at the end of the roll and thankfully I was able to snag an extra half meter! Woohoo. Now the question was, what would I actually do with it? See, I had no plans when I asked for more…just regular old fabric stash hoarding.

It’s a light, summery print, but the knit is quite warm and squishy so I needed a pattern that would work for all seasons. I eventually narrowed down to either the True Bias Marlo sweater or a Tilly and the Buttons Coco sweater. Both would be so perfect but I couldn’t choose and I didn’t have enough to sew two sweaters…or did I?

IMG_9019

I started getting creative with my pattern pieces and noticed that if I made *cropped* versions of both patterns, I could juuuuust squeeze both onto this yardage. I could have my cake and eat it too! I am planning to write a larger post soon about how I actually managed to pull off this fabric wizardry but for now, sweater number one: The Coco Top.

The Coco pattern already has such a retro 60s vibe with the wide roll neck, so making a cropped version feels like a natural fit. I cut a size 3 of the pattern and naturally had to make a few adjustments. I chose to crop the length at the waist  ‘lengthen/shorten’ line and then added 1 inch for a wide hem. I also eased the curve into the waist and made it fall more straight down from the bust.

IMG_8383

As per my usual tall-gal adjustment, I added 2 cm to sleeve length, but after sewing it up and trying it on I realized the sleeves were still a wee bit too short for my preferences. (It was totally wearable but I like my sleeves to basically cover my whole hands, especially in snuggly fabric.) To combat this I went back into my off cuttings and was able to cut out two rectangles and added little cuffs to the ends of the sleeve. It makes the top a little more casual feeling but it also feels pretty natural on such a plushy knit.

In my creative pattern finagling, I couldn’t cut the neck piece on the fold (which would have one center back seamline), and so I had to cut it in two and have two seams. I aligned them at the shoulders and you can’t really tell. One thing I didn’t consider was the thickness of the fabric affecting the rolling over of the neckline. I didn’t have much fabric room to play with, but in the future if I were making this pattern in a thicker knit, I would make it a little taller so it would fully roll over properly. Again, not a big deal and it doesn’t change the overall outcome, but its one of those small details.

IMG_8347

As for construction, it zipped up super quickly in an afternoon, just using the overlocker and ta da! It’s been pretty fun playing with ways to style the sweater. I had assumed it would be more of a spring/fall garment but I found myself digging it out over the winter and wearing with wool skirts for a serious retro look.

Stay tuned for part two with the Marlo Sweater!

Ultimate Winter Coziness // Named Talvikki Sweater

featuring the named patterns talvikki sweater

Hurray! It’s the first make of 2022! In fact, its’ my first (garment) make in nearly a year now. A lot of that had to do with moving to a new space. If any of you have moved recently, you know how much of a disruption it can be to your sewjo. It’s not just getting it unpacked, but also organized and inviting, making it easy to feel inspired to get going on a project. It’s been a while putting this room together and there’s still so much to do, but I’ve gotten to a point where I am feeling creatively excited and have the space to make some fun things happen. On to the sweater!

The pattern is the Named Talvikki Sweater, a much loved pattern in the community for its classic silhouette, developed in a really fashion-forward way. I’ve had it in my stash for years but found myself struggling to find the ideal fabric for it. I wanted something that had some texture or color variation, (worried that a solid, smooth color would feel too bland on such a high-coverage sweater) but not a print. I wanted something snuggly to play with the oversized vibe, but structured enough to hold the shape of the neckline. It also needed a decent amount of stretch too, to get it over your head. Quite the tricksy combination. For the last few years, as the winter seasons approached, I kept my eye out for the seasonal fabric launches. Luckily this year Blackbird Fabrics had just the ticket: a lovely boiled wool in a light, heathery grey.

Kat peeks out from behind the high neckline of the sweater

I bet the first question you have is… is it itchy? If you are super sensitive to the feeling of wool, you may find it a tad rough. I can be picky with wool sometimes, but because this fabric isn’t particularly ‘fuzzy’ (which is what bothers me), I find it comfortable. It has a pleasant squish and it feels like pure cozy. But just in case, I did take a few steps to mitigate any potential irritation, and I’ll get back to that in a moment.

I cut a size 4/6, and I did my usual length-adding adjustments. With each new pattern I will start by holding up the pattern pieces to my body and deciding how much I need to add, since it can vary depending on the style. I decided to add just 1 cm to the waist length and about 3cm to the sleeves. I think the proportions are perfect, especially the sleeves. In a softer fabric I may consider increasing the waist length a bit more since it may feel a little short with the fabric drape at the front (notes for future self).

Kat poses to the side to show the side split and high-low hem

Because the boiled wool is so structured I opted out of adding interfacing to the neckline, knowing it could hold its own. In fact, I was worried that even just a facing of the same fabric would be *too* structured. This was also where I was most worried that the fabric might be irritating on my neck. So the two-in-one solution? Cut the facing from a soft ponte knit. It had a smooth feeling for the inside of the sweater, reduced bulk and there’s still plenty of structure. The ponte facing was sewn with under-stitching to give it a fighting chance against the wool pulling it to the outside and I vigorously tacked it down to the shoulder seams and darts as well for good measure.

Kat rolls up sweater sleeves to reveal contrast lining

When I was cutting out the facing piece from my ponte, I also had the idea to add some sleeve facings. At first for comfort, but also as a nice contrast if I decide to roll the sleeves up a little. To cut them out, I traced the sleeve pattern piece from where the fold-up hemline was marked to about 10cm up the sleeve.

Flat lays of the sleeves and sleeve facings being attached

To make the cuffs, I sewed the bottom of the sleeves to the facing right sides together, turned up the hem allowance, pressed and under-stitched. Here, I decided to topstitch the facing down before sewing the sleeves. I could have sewn the side seams starting from the cuff up the sleeve then rolled it inside and topstitched. This would have given a ‘cleaner’ finish on the inside of the garment, but I was concerned that having that ‘double’ seam on the inside would be bulky and wobbly. By doing the side seam after, you can see the overlocked seam on the inside cuff when I roll up the sleeves, but all 4 layers of fabric are overlocked together which feels smoother.

before and after demonstration of strengthening the seamlines

Speaking of the fabric thickness, I did need to make a few construction accommodations. I adjusted my stitch length on my machine to 2.8 to keep things running smoothly. The instructions call for a lot of the assembly to be done with the overlocker, which I love and did, but because the fabric is so bulky, the stitch threads were looser to accommodate that and looked ‘pulled apart’ on the right side. Structurally, the seams were fine, but I did opt to run some of the higher stress seams (shoulders, armholes) through my regular sewing machine to get them real snug so there were no snags or mishaps in the future. 

I sewed this sweater during a -30 degree cold snap as the perfect solution to the chill and 2 days after it warmed right up to 0. Naturally. It made it nicer for photos but I have to wait until our Canadian winter gets back into gear before I can really enjoy the full cozy majesty of the wool.

After waiting so long to make it, I can say I am so happy with this pattern. It’s a dream. The shape of the neckline with the cool darts just feels so chic for a pullover. Its the perfect ‘elevated casual’ I aspire to. Upon reflecting on my me-made wardrobe a while ago I noted that I don’t really wear as many makes in the winter because I just wanna live the snug life in sweaters and pants instead of the dresses and skirts that usually come off my machine. This is a perfect winter addition to my wardrobe that feels classic but also casual enough for lounging around. My only hope is that it doesn’t take nearly as long to find ideal fabric if I want to make another in the future.

Comfortable Sewing // Hudson Pants and Odgen Camis

For the longest time I was a one-and-done seamstress. It was rare for me to make the same pattern twice, and if I did, it was in a wildly different fabric or for a specific situation. I sought out novelty and let the TNT (tried ‘n’ true) train chug right on by. It felt wasteful to have multiples of the same thing in my closet when variety was the spice of life. Why wear one thing, when you could wear ALL THE THINGS?

As time wore on, my skills improved and I settled into my style persona. I started making patterns that were quick and satisfying, but elevated my wardrobe in a major way. And repeating them. Thoughts would drift to new fabrics and colours of these basic patterns that could fill multiple spots in my wardrobe. It became apparent that if I made variations of similar building blocks, I could make outfits I knew would look good without much thought. They could be mixed and matched in endless ways, which turns out to be much less wasteful than lots of single pieces that would only work in one specific outfit. Maybe there was something to this TNT thing after all.

The first of this new wave of TNT’s was the True Bias Ogden Cami. I was wary when it first hit the scene, as I traditionally avoid v-necklines at all costs. But one New Year’s Eve I needed a quick pattern for a sequin top and the simple lines and easy PDF print made me take the plunge. And whaddya know, I found the neckline to be flattering in a way that v-necks typically aren’t on me. I really loved that sequin one, and then a few months later I needed a project to bring along to a sewing afternoon with a friend. Few pattern pieces, no fiddly notions, and could be completed in a few hours? Check, check and check. The rest, as they say, is history.

As this spring approached, I cut out three more in a variety of fabrics to suit different moods and outfits. One sophisticated solid linen, one punchy Liberty lawn and one breezy polyester polka dot print. I decided to knock them all out in tandem. Can I just ask, how come no one told me how awesome batch-sewing is? It was so satisfying to watch them all come together as a group and having 3 full new garments at the end of what felt like one project.

In order to streamline my progress, I determined that a navy thread was a common enough colour denominator between the three fabrics. I used that for the entire construction, only changing to matching threads for top-stitching and under-stitching at the end.

The only pattern changes I made were extending the length about 4 cm (which I slashed and spread right into my pattern pieces so all future ones will be this length), and I got slightly adventurous and rounded the neckline on the polka-dot one, to see if I’d like it. It works, but it takes away a bit of the “style” of the pattern I think, and makes it more basic. I’ll only do this again if I am making ones specific for layering with other things.

Now, normally I’d be pairing these new tops with jeans and a cardigan and be on my way, but as we all very well know, ain’t no one wearing jeans right now. I needed comfy pants (that aren’t literal pajamas) and stat.

I knew the ticket would be the True Bias Hudson Pants (I just realized this is a full True Bias look!). I’ve had this pattern for years in PDF form after it came bundled in the Perfect Pattern Parcel (RIP). I bought the bundle for the Julia Cardigan, but was interested in the Hudson; I just never really had the need for them until now.

I searched my stash high and low for the right fabrics, trying to not break my recent “no shopping until you complete the other things you started” rule, but right now, most of what I have on hand are woven fabrics and novelty prints (or not enough of something for pants). Blackbird Fabrics just *happened* to release a collection of bamboo and cotton stretch fleece fabric a few weeks ago and it just called to me as the comfort I’d want in a house pant.

And yes, these are going to be house pants. I could wear them out in the world (once it’s safe to do so, obvs), but if you’ll allow me a small side story…

A few years back, a few sewing bloggers talked about the Kibbe style identities. I went down the rabbit hole, and while there are some issues with the system (and fashion has no real “rules”), one part of the system really struck a chord with me and helped define something I had trouble articulating in my closet. The system recognizes 3 different ‘levels’ of dress, 1 being most casual, and 3 is most formal or “dressed up”. Different style personalities can play with the bounds of these levels more than others. For example; on some people, joggers and a tee looks stylishly casual as level 1, while myself in the same outfit feels like I look like I’m heading off to help paint the fence (level 0? Ha). I fall under soft dramatic, which tends to work better in things that are a little more streamlined and crisp, leaning a level higher than other types. I’ve always felt sloppy in very casual clothes, like cute hoodies or graphic tees, even when those items look SO GOOD on others. On the flip side, I feel like I might wear my Keilo Wrap Dress in more casual settings than the style typically suggests. This is just what resonated with me though; you sew you.

Anyways, for comforts of home, these joggers were a super fun and fast make, and especially since I also batch-sewed these. I did them up mostly on my serger and they came together in just a few sessions with very few changes. I wanted the lime green pair to be cropped at the ankle but not as short as mid-calf pattern option, and the grey pair to be full length. The pattern is drafted for a 28″ inseam, and since I have a 30″ inseam, I left the pattern as-is for the green, and added the 2″ extra to the grey. My only complaint is that I wish I took in the waistband juuust a smidge. It’s slightly too large and I have to rely on my drawstring more than I intended. I could take the elastic in, but the amount of unpicking required isn’t worth the amount it actually bothers me. It’s more a note for future versions I may embark upon.

I am super happy with these pants, as they are as comfortable as pajamas, but I feel a little more like myself putting them on in the morning. I love the contrast details with the black and grey and the bright punch of color with the green that make them extra special. I’m not embarrassed to go check the mail in these, and the soft fleece is so heckin’ cozy.

Once I finished both the pants and the camis, I wanted to finish them up extra special. Enter: some fun labels! These are from Kylie and the Machine and I got them from Blackbird Fabrics. The “this is the back” tag I find especially useful on the Odgens, since the back and front are very similar and I have gotten mixed up on more than one occasion. It’s an extra special touch that I want to put into more of my garments, especially the ones that I know I will wear a ton. It just feels a little more legit, y’know?

Now if you’ll excuse me I have to live out the rest of my Me Made May days in these comfy clothes and make more progress on my UFO (Unfinished objects) list. Happy weekend!

In A Twist Dress

Last summer I very distinctly noted a desire to wear only comfortable knit dresses, especially when in a heatwave. Naturally, I had only one knit dress at the time. In my seasonal wardrobe planning this year I mapped out a cool, grey t-shirt dress with some sort of fabric detail to fill the void. I felt inspired by the style of knotted t-shirts, feeling like in dress form, it would be the perfect mix of casual and a little dressier.

I found the perfect grey bamboo jersey at Blackbird Fabrics which I set aside for this dress. I hadn’t an exact pattern in mind but I knew the vision I had for it, so I kept my eyes out. Eventually, after some more intentional searching, I found the In a Twist Dress from So Sew Easy. It was was still simple with the right touch of visual interest and detail.

For something that looks so complicated, the twist “knot” was actually the easiest part of constructing this dress! The directions are super clear and the funny looking pattern pieces just seem to fall into place. It has such high impact for low-effort, and I will definitely be using this pattern again.

The difficult parts in the construction came from my own meddling. I wanted to make the pattern a little more casual and t-shirt style. I decided to use the Deer and Doe Plantain tee as the top of the bodice for the neckline and sleeves. I wasn’t sure the best way to merge the patterns together so I began by just lining up the underarm seam and tracing the Plantain pattern above. I noticed that the top of the shoulder seam of the Plantain was about 6 cm higher than the top of the shoulder seam of the In a Twist dress. I wrote it off as extra fabric for the sleeve. But obvious to me now,  the hack meant that the bodice was 6 cm too long, and resulted in the waist knot sitting nearly on my hips. Whoops.

I remedied the situation by unpicking everything above the waist (sooo many little threads thanks to overlocking everything), and retracing the Plantain bodice 6 cm lower than initially planned. After all this frustration (and third time sewing it) my neckline binding was over-stretched and flopping all over the place. This is where we note that sewing late at night, with expectations of finishing a project for the next day, and patience running low is not the best combination. Frustrated at what felt like a failure of EVERY SINGLE neckline I’ve sewn EVER, I basically vowed to quit sewing forever and that’s where this post ends.

I am kidding. Don’t sew while sleepy, friends.

After a few days and mental recovery I cut another neckline binding (and to the advice of the sewing community I cut it on the bias for extra stretchiness and recovery) and it was beautiful. It all came together in the end.

Sadly, summer decided to bid an early adieu. I was lucky to get this out on the town exactly once before the chill. But oh boy, next year I will be cruisin’ cool and comfy alllll the time.

I would like to say that I have a perfect road map of my fall and winter sewing, but I am really feeling like I need to go with the flow right now. I have some fun ideas in the queue (will this be the winter I make my Ginger jeans??) and I am going to follow my inspiration and sew what gets me excited and motivated.

Happy fall!

Two is Better than One // Zadie Separates

Zadie Separates // Boots and Cats

I am just in the nick of time to share my #FailFebruary garment! Even though in the end I found a creative solution to turn around what was a sad little project, I found it amusing that it went so wrong so many times this month. Maybe I just had to share a fail with y’all, no?

Earlier this month, I was really excited to see the new Zadie dress pattern from Tilly and the Buttons hit the scene. I love the interesting seaming and pleat details. In what can sometimes feel like a sea of basic raglan and shift dress patterns, this dress felt fresh and unique to me. I’ve really been appreciating patterns that give us different and interesting elements or seamlines that let us play. The colour blocking possibilities with this pattern in particular are endless.

So naturally I chose two fabrics that barely contrast each other.

I knew I wanted to make this dress up quickly, to both catch the ‘new release’ wave (since I am often years behind haha) and to give myself a cozy but cute winter dress that my wardrobe really needs right now. I didn’t have any fabric on hand so I went on the hunt and it was SO HARD to narrow down what I wanted! Did I want to play with a print? Contrasting colours? Mixing something neutral with something to stand out? I seriously stared for hours at my million online fabric shopping tabs and the colouring sheet in Photoshop rendering every possible combination. Eventually I narrowed down my fabric to this cozy french terry in two soft colours (oyster and ivory) that would just give a hint of the contrast. After one too many bright dresses that are amazing but I never wear, I figured something more subtle would be nice. Plus, I’ve been loving my Linden in this fabric and knew it would give optimal cuddle factor, and coming from Blackbird I would have it within the week. Sold.

The Zadie pattern itself is a really neat pattern. Instructions are clear, and even the tricky corner seaming of the side panels/waistline/skirt was straightforward. (Though admittedly I DID have to hand stitch the corner closed, both my fear and the squishyness of the fabric made it difficult to run my seams right up to the exact point, but it was an easy enough solution). It sewed up very quickly and I loved all the tips and tricks along the way. Just a note for fabric shoppers, as with all Tilly patterns, they only list one set of fabric requirements, so if you are on the lower end of the size range, you don’t need to buy as much as they suggest (though in my case, having extra on hand turned out to be a huge blessing).

Zadie Separates // Boots and Cats

I was so excited to bring this dress to reality once I got my fabric, but the further along I got in the construction, I started to get fears about my fabric choice. Even though I chose a medium weight knit, as suggested, I kinda took for granted the bit about the stretch recovery. As I added more and more pieces to the dress I realized how heavy it would all end up being. The fact that the waist doesn’t have a full seam meant that the side panels would be taking the weight of the skirt. The french terry had such soft stretch that my fears were realized as soon as I slipped it on… I had one droopy, sad sack of a Zadie. Womp womp.

This was actually so disappointing, and really a fundamental mistake on my end, ignoring how the design of the garment and the fabric would interplay with one another. I didn’t want to start from scratch, mainly because the fabric is soooo comfy and a great quality, I’d hate to see it go to waste (plus, start the agonzing fabric/colour combination hunt all over again? No thank you). It basically came down to two options; take in all the seams in hopes of letting a tighter fit support the weight of the skirt… or give it the chop. In a traditional fit-and-flare pattern with the seam along the natural waistline, this decision might have been easier to make, as the two halves would be leaving a bit more to work with. But the empire line pretty much determined that if I wanted to use the top at all there would need additional fabric to be added on.

After staring at it on the dress form, asking friends for advice, covering each half with my hand with one eye closed to try and envision what might happen for about 3 days I decided just to go for it. I first unpicked the seams attaching the skirt to the bodice, then measured and marked the halfway point to cut through the side panels. Out came the scissors and soon I had a sweater AND a skirt. Yippee!

Zadie Separates // Boots and Cats

To finish the skirt, I dug out an 1.5 cm elastic and measured it around my waist at a comfortable stretch. I then measured the width of the skirt waist to get the circumference of my new waistband and cut it twice the width of my elastic plus seam allowance. I used my overlocker to attach the band on one edge, folded over, and hand-stitched the other edge with an opening to feed the elastic through. There wouldn’t be an easy (or flattering) way to wear the skirt at the original empire waist, but with the a-line silhouette it works perfectly fine at the natural waist.

For the sweater, I decided that adding a wide hem band that ended at my natural waist would be the simplest option and would make it a versatile piece to pair with my high-waisted skirt collection. To make the band I measured the hem of the bodice laying flat, then took the length I wanted the band to be (10cm) then doubled it. I cut two rectangular pieces from those measurements. I sewed them together lengthwise, pressed them in half, then attached it with my overlocker to the top (exactly like the hem band on the Linden). The first band I cut I reduced the width to have extra negative ease so it would sit nice and tight. However it was too small for the top which meant that put together the seam was laughably wobbly, wavy and so sad. Plus whenever I moved my arms it would ride up and not slide back down. SO MANY #FAILS.

After sitting in time out for a week, I unpicked the old band, redrafted the hem band without reducing the ease and it worked like a charm. Phew.

Zadie Separates // Boots and Cats

If you want to make this pattern into separates before you sew up the whole thing, just line up the side panel pattern piece along the bodice and mark the seam line. This is where you can cut the side panels, add your seam allowances and repeat for the back pieces. I can make a little tutorial for this if you’d like, since pictures are probably more useful than words. Just let me know 🙂

After all the trials, tribulations and fails, I am actually really stoked about how the cropped sweater turned out! The princess seam details are so unique and unlike anything I currently have, and it will pair so well with my selection of skirts. If I am being completely honest, the skirt was less of a success. The pockets show through the fabric and look kinda lumpy, and the colour doesn’t go with too many of my tops. It is wonderful as a lazy, cuddly, at home skirt, so who knows. I can also wear them both as an ensemble, but I don’t think I will actually do so, especially when mixing and matching can be far more interesting.

Zadie Separates // Boots and Cats

I’ve enjoyed following along with everyone else’s projects they’ve shared that have been less than ideal. It’s always reassuring to know that it’s not always sunshine and roses and sometimes projects don’t work out. We can only hope to reflect, learn and become better seamstresses.

This pattern was gifted to me as part of a request to preview the Zadie pattern. All opinions and sewing gaffes are my own.

A Taste of the 60s // Striped Coco Dress

Tilly and the Buttons Coco Dress // Boots and Cats

I’ve got another really fun one to share with you today. For the second look capturing the fun and bright spirit of the 60s, how could I deny you the most perfect retro-made-modern dress that is the Tilly and the Buttons Coco?

I realized that I don’t really have much to say about this dress, yet it’s one of my favourite makes to date. It’s funny how that works out that way. When I initially got this striped fabric, I knew right away this was exactly what it was going to be. A striped Coco has been on my sew-do list since I first laid eyes on the pattern. I talked about my finding-a-good-striped-fabric woes in the post about my Coco Breton top last month, but if you got any good stripe sources, hook me up!

Both striped Coco projects were actually cut out at the same time. I cut out the dress, then noticed I had enough left to make the breton top too. Probably because it was still pants weather at that point, the top got made first.

On that note about pattern cutting, I have to ask, what’s your process with sewing projects? Do you work on a single garment, start to finish before starting something new, or do you have multiple things on the go? I used to be strictly one-at-a-time, but I found I ended up sewing less frequently because of it.

Cutting out pattern pieces is definitely my least favourite part of the process (it doesn’t help that I don’t have room for a table and I work off the floor) so it takes a lot of inertia to get started on a project, especially if I am short on time. I have started to cut out a few projects in bulk when I have lots of energy, so I have at least one or two projects ready to go when sewing time is scarcer. I do have to be careful not to prepare TOO many projects or else they stare me down and make me feel guilty they aren’t done yet, but so far this is working pretty well. I’d love to hear how you work around your projects and prep things to sew. I’m all about streamlining.

Anywho, back to Coco.

I was trying to think about why this dress just worked for me. It was hard to narrow it down to describe. It’s this perfect blend of simple yet bold, classic yet unique, different but everyday wearable. It’s everything all in one, and it just ‘clicks’.

This makes my third Coco overall. I said it before, but I think this pattern will be my ultimate TNT. I remember when I first started thinking about what I truly wanted from my clothes, I was often pinning styles that had the 60s funnel neck collar, without pinpointing that was a design element I loved. Once I discovered Tilly, it totally made sense to me, and it was one of the first indie patterns I bought. Unfortunately my first top was made of a poor quality fabric and hasn’t worn super well over time.

Construction notes are super basic: Straight cut in size 2 with usual waist length added. I wanted to play with the graphic nature of the stripe so I opted for the option with contrast cuffs. I thought of adding in the pockets too, but it was much too busy. It was all sewed with the overlocker except for the hem.  Easy peasy lemon squeezy.

Tilly and the Buttons Coco Dress // Boots and Cats

The thick ponte makes this dress the perfect transitional piece for this strange winter-spring (winting?) hybrid season we are currently having. It’s soft and snuggly with a print that says bring on the sunshine. I also want to make more Coco tops in a selection of basic solid colours (though my stash is currently lacking in the solid color department…) to wear year-round so keep your eyes out for more retro goodness.

One more look coming from this photo session with Breanne Marie Photography comin’ atcha next week.

Stripes & Solids // A Colour-Blocked Coco Top

Colour Blocking your Coco Top // Boots and Cats

If you asked me to describe my style I would probably tell you something along the lines of: classic, kinda preppy, with a vintage twist. I have a tendency to make some very loud statement pieces that step outside of that description, but on the daily I tend to feel most comfortable and confident in neutral colours and classic cuts. You’ll find me often in skinny jeans and cardigan, or if I’m feeling fancy, a high-waisted skirt and a comfy sweater.

But for the longest time a crucial staple in the classic-preppy-vintage style profile was glaringly missing from my wardrobe selection: a Breton top. (Or as most people know it, a striped shirt, or sailor shirt. Tilly rounded up a wonderful history of it here)

I’ve always loved the ease and style that was exuded from a Breton. So effortless, so chic. This admiration, of course, made me unwittingly picky about what it should be. Not too sheer or draped, has to have the classic wide neckline, long sleeves, preferably colour blocked, with smaller, unbalanced stripes.

How could any shirt possibly meet those standards? Turns out, they couldn’t. It seemed the more I looked for the perfect shirt, the more elusive it became.

Colour Blocking your Coco Top // Boots and Cats

So I turned to the wise muse that is Dr. Seuss in one of his all-time classics.

Did that stop the old Grinch? No! The Grinch simply said,

“If I can’t find a Breton top, I’ll make one instead!”


(That’s totally how it goes.)

Though, as you sewing folk will know, simply deciding to make the perfect Breton top isn’t as easy as waltzing in to the nearest Fabricland to get started. Finding a halfway decent striped knit can be like searching for a needle in a haystack. Even when I did manage to find a fabric that was soft, had good stretch recovery and weight…it was always in the weirdest colour. You’d think black and white would be far more in demand.

Thankfully, this Christmas I received the most wonderful gift. I opened the box and inside was a beautiful black and white striped ponte knit from Girl Charlee. The heavens opened, angels sang, and many projects were planned.

I unquestionably chose Tilly & The Buttons Coco for the pattern because it perfectly encapsulates the vintage and modern vibes I love. (I plan on making many 60s funnel neck versions soon too! I think I can safely say this is one of my first TNT patterns)

Colour Blocking your Coco Top // Boots and Cats

I wanted to soften the look of the stripes for this top and opted to colour block the shoulders. Ideally it would have been in white, but the ponte I had was a slightly cream colour and didn’t match. Luckily, black goes with everything.

I looked into some colour blocking pattern hacks in bloggerland and it seemed like a pretty simple adjustment. The Grainline Lark tutorial was the easiest way I found to line up your blocked seams. I did start to notice, however, that the shoulder curves on the Coco sleeves were quite shallow. I feared this would mean that if I blocked my pattern straight across from the armpit seam it wouldn’t cut straight across my body as I wore it. I didn’t want to lower the blocking either (it would look strange if it cut across the bust), so I would need to do some crafty drafting.

Colour Blocking your Coco Top // Boots and Cats

Using a highly professional (made-up) method, I had to determine the shape of the sleeve cap so it would appear straight as I wore it. I put on my first Coco I made and took an elastic band and wrapped it on my arm. I moved it up until it was touching the underarm seam and arranged it to look straight. I then got Rory to take a measurement of the elastic to the shoulder seam. This distance was about 12 cm. (If I cut straight across the pattern piece, this distance was closer to 10cm, meaning it definitely would have angled upwards when I wore it).

To make my pattern pieces, I traced the sleeve onto some paper and measured 12 cm (+the seam allowance) down from the center of the sleeve. Using a dressmaker’s curve, I met the center line with the underarm seam points, so it would match my blocking point on the bodice. I then cut along this curve, added seam allowances, and had my new pattern pieces!

Colour Blocking your Coco Top // Boots and Cats

It was stressful cutting out the pattern pieces, not knowing if this would actually work or not (yet not stressful enough to make a muslin it seems…). The stress must have impeded my attention to cutting detail and I totally miss-cut one of my sleeves (it was the bottom layer and I didn’t notice I hadn’t enough fabric in that spot). I hate that feeling of wasting fabric on silly mistakes.

Then for some strange reason after I re-cut my second sleeve and compared it to the first, even though they start on the same stripe and measure to the same length…they end on different stripes? I tried to even it out when hemming but I didn’t want to make one sleeve much longer than the other. Can’t really explain how that was accomplished…but hey I bet you didn’t even notice.

I cut a straight size 2, but added my usual 6cm length to the bodice and sleeves, and took down the flare of the pattern a bit at the hips.

Colour Blocking your Coco Top // Boots and Cats

The sewing was a breeze, as this wasn’t my first Coco rodeo. Tilly’s instructions are beautiful and simple with helpful tips thrown in. I just love this pattern so much.

And wouldn’t ya know, my pattern hacking totally worked out! It can be harder to see in the photos because the stripes and fabric movement, but the line of the colour blocking is DARN NEAR PERFECT! Aha. Victory. Pattern drafting and I have a nice streak going.

I am so pleased to welcome this classic staple into my wardrobe FINALLY. The ponte is soft, stretchy and quite thick, making it a wonderful winter top. Come summer though, I might want to make a lighter weight version.

I guess the search for stripes continues.

Halloweaving

A Halloweaving // Boots & Cats

I love Halloween. This can be evidenced by the fact that I am wearing glow-in-the-dark pumpkin socks and eating a ghost cookie as I write. As soon as the calendar flips to October my apartment is fully decorated and I plan in as many spooky (but not scary, mind you) activities to make the most of this holiday.

I can’t really pin-point exactly what I love about it so much. I love the visual aesthetic of orange and black, not to mention the graphic style of vintage decorations. It could also be the child-like sense of fun in creating costumes and getting together with friends. Or it could just be the copious amounts of sugar. Who knows.

What I do know is that I can’t get enough and love to fill my days with Halloweeney things. Best way I find to do this is to infuse the spirit into my crafting. (Pun? I think so.)

A Halloweaving // Boots & Cats

This year, I happened to buy a loom and take up weaving in September. Loom weaving, especially wall hangings, has been on my radar for the last few years but I never jumped into it- I guess I had too many other crafts on my plate. Then this summer some really stunning work repeatedly popped up on my feed that I felt really inspired and connected to. I went to Etsy and got myself a loom, and an arm load of yarn to play with.

As hard as I tried to take a workshop with Lucy Poskitt while I was in Vancouver (I visited twice recently and BOTH TIMES she taught the day after I left) I didn’t take any classes to get started. I read a few tutorials, mainly from A Beautiful Mess, but I found it pretty easy to get the hang of it. Sure there are some basic techniques you need to know, but once you get those down, honestly the main skill required is patience.

A Halloweaving // Boots & Cats

This isn’t a quick craft, especially as your pieces get larger, but the creative possibilities are actually endless. You can play with geometry and colour blocking, gradient tones and abstract textures, or bold motifs. The bulk of what I’ve seen is abstract work, with lots of chunky elements and fringe, which is stunning, but I find that my default is lots of structure, uniformity and simplicity. My first few pieces were primarily geometric shapes, but the lightbulb went off for me when, in an ABM tutorial, Rachel said “think of shapes in pixels”. My mind rushed with words and  shapes I could incorporate into more graphic style work.

A Halloweaving // Boots & Cats

And with Halloween coming up, there’s no better time to put that idea to work! I knew right away I wanted to play with some cute little ghosts flying around and sketched out some shapes. I found it quite helpful to design on grid paper to keep in the ‘pixels’ mindset. To ensure I kept true to my design, especially on the rounded shapes, I actually drew it onto my warp yarn with a sharpie, to act as a guideline. It might be cheating but it works!

I constructed most of the hanging using a basic basket weave (over one-under one) using contrast yarns for the ghosts and sky. I could have left it like that, but I picked up an amazing orange yarn from Rain City Knits in Vancouver and needed to incorporate it. I used it to add some extra texture and highlight elements. I was a little on the fence about it at first but I think it heightens the overall look. Makes it ‘pop’ if you will.

A Halloweaving // Boots & Cats

Like I said, weaving takes a lot longer to complete than you think. I would estimate there is about 6 hours of work in this little guy. But hey, what better way to binge watch Netflix shows. (I am all about Once Upon A Time right now… that’s kinda Halloweeney right?)

These little ghosties are now hanging in my ‘Halloween corner’ of my living room along with some spooky flowers, pumpkin lanterns and glitter bats and seems to fit right in.

A Halloweaving // Boots & Cats

Now that I’ve completed my fourth weaving, I can stay that I am quite enjoying it. I always loved the fluffy texture and the endless array of colour in yarn, but knitting and I still haven’t completely hit it off. I am already brainstorming many more things I could weave. The loom is relatively non-intimidating to experiment with in terms of design and techniques which is really nice.

Now I just need to get ALL the yarn! Muahahaha

Everyday Basics // The Julia Cardigan (with pockets!)

A perfect basic - the Julia cardigan // Boots & Cats

About 5 years ago I bought a sweater from Urban Outfitters that very quickly became my all-time favourite. It was lightweight but still warm, had a draped sort of style that could be dressed up or down, it had pockets and it was black. This sweater went with 80% of my wardrobe and was my go-to whenever I needed to feel put-together and stylish. I still have it and wear it occasionally, but time pills all fabrics and I needed something new.

Patiently sitting in my fabric stash was 2m of navy blue bamboo jersey. I acquired it during my internship at Télio and it’s been staring at me for the 2 years since then. It has beautiful drape, a good amount of stretch and is unbelievably soft. I couldn’t simply make ANYTHING with it. It had to be something really great that would be worn a lot in appreciation of it’s quality.

Super loooong sleeves.

Super loooong sleeves.

On some level I had been been hoping all these years to replicate that sweater with this fabric but struggled to find a pattern that fit the bill. Most patterns I looked for had a really long draped front, featured just tonnes of excess fabric or wasn’t my style. I felt a little hopeless and even contemplated self drafting.

Enter Julia.

The moment I spotted the pattern I knew she was exactly what I wanted. I saw that it was a part of the Perfect Pattern Parcel #6 and promptly purchased the bundle (the other patterns were just a nice bonus). It was a dream come true.

A perfect basic - the Julia cardigan // Boots & Cats

My one criticism? No pockets! I need to have pockets in my cardigans, not just to hold items like my phone (always a plus), but I feel way more comfortable when I have a place to put my hands.

I contemplated restructuring the front of the cardigan and adding new pocket pieces, then I realized the doubled over collar band could be used as a pocket bag and all I needed to do was create an opening on the outer layer.

A perfect basic - the Julia cardigan // Boots & Cats

I followed the instructions up until right before attaching the collar band to the rest of the cardigan. I measured the approximate placement of where I wanted the pockets to be and marked the pocket placement. It was here I noticed that the seam where the front and back band pieces met was pretty much where I wanted the pocket to end. I could stitch in the ditch to close up the pocket bag. (This way I won’t have to fish out random pocket objects that floated all the way around the band).

I stay-stitched the opening edge to keep it from stretching, then attached a bias binding to give it some structure. This was a real test of my patience as stretchy fabrics don’t play well with rigid ones.

Then finally as I pinned the collar band all around to the rest of the cardigan, I eased out the one layer from the serger to create the pocket opening on the way ’round.

Did you notice something odd about the way the pocket is pinned in picture 4. there? That’s right! Just as I thought the project was complete I put it on to see that I had accidentally flipped the band around and put the POCKETS ONTO THE INSIDE.

A perfect basic - the Julia cardigan // Boots & Cats

Kids, this is why you should stop sewing before midnight on a Sunday.

Instead of picking ALL the serging around the whole collar band (at the risk of destroying my pretty pretty fabric), I just unpicked the pocket ‘opening’, repeat the bias taping process and then serged the correct side down onto the sweater. A little annoying but totally salvageable.

The Julia cardigan was so simple (minus the pocket fanagaling) to put together. It was a two session project and the next one (and there will be more) will likely be a one sitting deal. I did add about 6cm to the length of everything since I wear my sweaters long. It did make my sleeves a tad too lengthy (they practically cover my hands if I let them) but I decided that I like that fact and it makes me feel extra cozy while wearing it. But because of this and the doubled-over collar, the pattern devoured all 2m of my bamboo *sniffle*. I was hoping I would have enough leftover to make a comfy top or something but only scraps remain.

Soon the weather will be nice enough to shoot outdoors again...

Soon the weather will be nice enough to shoot outdoors again…

Is this the new sweater to beat? Will it take over as reigning wardrobe champion?? Only time will tell – it looks great with jeans, but still needs to pass the skirt and dresses test to know for sure.

What I do know is that I put that special fabric to some darn good use and I am so excited to be building more wearable basics into my wardrobe.